How a New Photographer Can Create a Photography Studio
Most photographers dream of owning their own photography studio. But in most cases, they are also often intimidated by the logistics and costs.
Our short guide will help you navigate studio photography with ease.
Below you will find a list of the tools you will need, as well as some tips on how to set up your studio space!
1. Photography Equipments

Professional photographers can not do without professional photography equipment, which is the basis of their shooting. A variety of photographic equipment is the first step to build a studio.
In addition to professional cameras, the following equipment is also used by photographers in the studio.
First of all, lighting, a professional photographer can not do without good lighting, lighting is the soul of taking pictures, the right lighting to create a good atmosphere to help take beautiful photos. I think LED lights are a good choice.
- LED light

You can think of them as regular light bulbs with dimmers. Unlike a flash, you can see the effect of the light on your subject in real time.
Today, LED lights are cheap. You can get studio-grade fixtures for less than $200. However, it's important to note that the higher the wattage and light output, the more expensive they are.
- Reflector

You can think of a reflector as a small parabolic disk inside a flashlight. It concentrates the beam, thus creating a tighter spot around the subject.
The reflector has no diffusion material. Therefore, it is perfect if you want to recreate the effect of harsh sunlight illumination in a photo studio.
- Umbrella

If you don't like harsh lighting, you might want to consider using an umbrella instead. If you want to try portrait photography in a photo studio, this would be the perfect choice for you. Not only is it inexpensive, but it also creates a beautiful soft light that envelops your subject.
There are various types of umbrellas. Some are reflective and act more like a softbox. But there are also umbrellas that allow you to shoot directly through diffused materials. The former are more like softboxes, where the light is more directional. The latter allows the light to spread around.
- Softbox

In a way, a softbox works much like an umbrella. The only difference is that a softbox, unlike an umbrella, has a closed structure. As a result, it produces a more focused and directional soft light.
A softbox has a closed structure that allows you to focus the light better.
Softboxes are superior to umbrellas in that you have better control over the light that spills out of the softbox. Since softboxes produce directional light, they allow you to create more exaggerated effects.
- Light Stand

These light stands are necessary to support the lights and light modifiers you use in your studio. They come in different designs and specific weight-bearing capacities. Make sure your light stands can support the heaviest lights and dimmers.
- C Stand

These are reinforced light stands. They are larger and heavier than regular light stands and can hold more weight. We recommend using them if you are using large single lights. This way you can be sure that your light setup is always stable.
- Backdrop Stand

To take good photos, a good background stand is also indispensable, the background stand carries the backdrop, creating a variety of shooting scenes to meet a variety of shooting needs.
- Photography Backdrop

Backdrops allow you to change the view of your studio without painting the walls or changing locations. They come in many different forms. Some are basic cloth or paper backdrops, while others are made of vinyl or other materials.
2.Setting up a Photography Studio

Now, let's discuss the steps needed to prepare for a studio photography shoot. It is a simple process that you will find useful even when you are working in other studios.
- Setting Up the Background

First, you need to assemble the background stand. Depending on the length of the backdrop, make sure there is at least 4 to 8 feet between the stands.
A lady setting up a background in a studio.
Be careful when installing the seamless paper because it can tear if not handled properly.
Next, insert the horizontal rod into the roll of seamless paper and mount the rod on top of the stand.
At this point, you can adjust the height of the background stand and unroll the paper roll. You can use sandbags or tape to secure the corners of the seamless paper roll to the floor.
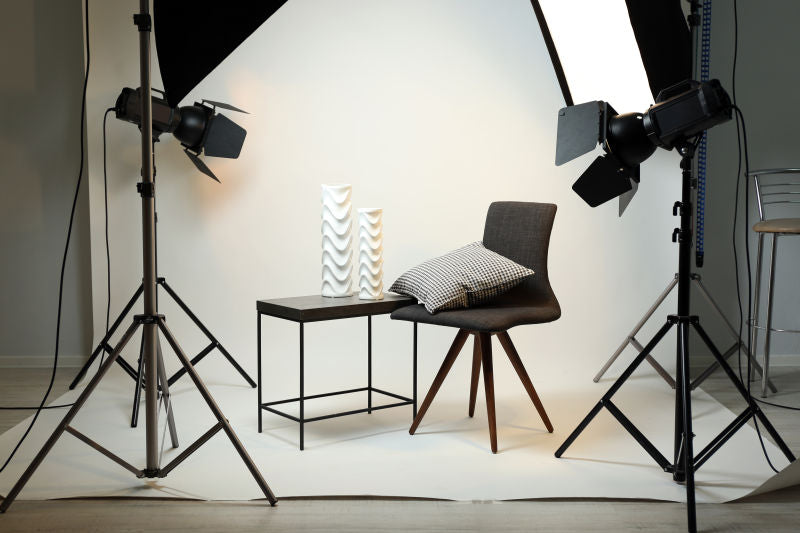
- Setting Up the Lights

Now that the backdrop is ready, it's time to prepare the lighting equipment. First, connect the light sources to the light regulators. Then attach them to the light stands.
Strobe lights to illuminate the navy blue background
Before installing the lights, consider which type of lights you need.
The number of lights you use in your home photography studio depends on what you need to do.
For simple portraits, one light and a V-plane/reflector will suffice. However, if you want to take glamor shots that require a more complex setup, you may need two to five lights.
If you want to learn more about the different types of studio lighting, check out our article here.
- Test the Lights and Equipments

Before you start shooting, do some test shots to see what you need to do with your lighting equipment. This is the perfect time to adjust lighting positions and check camera exposure.
A female photographer taking pictures of a model in the studio
Test the lighting every time to get the correct exposure.
If the light is low during the shoot, you have the option of changing the lighting or camera settings. We usually set the camera first and then adjust the lighting until the correct exposure is achieved.
Keep in mind that you will need to test continuous light and flash in different ways. LEDs emit a constant beam of light that you can see, so it's easier to adjust the camera settings. Flash, on the other hand, only produces a beam of light for a fraction of a second. Therefore, you will have to do some test shots until you get the right exposure.
Once you have tested everything, you can start shooting!
3. Conclusion
If you're just getting started with studio photography, seeing the equipment list can be overwhelming. But keep in mind that you don't need to buy everything on the list right away. In fact, you can start with backgrounds and background stands. As long as you have plenty of window light, you should be fine.