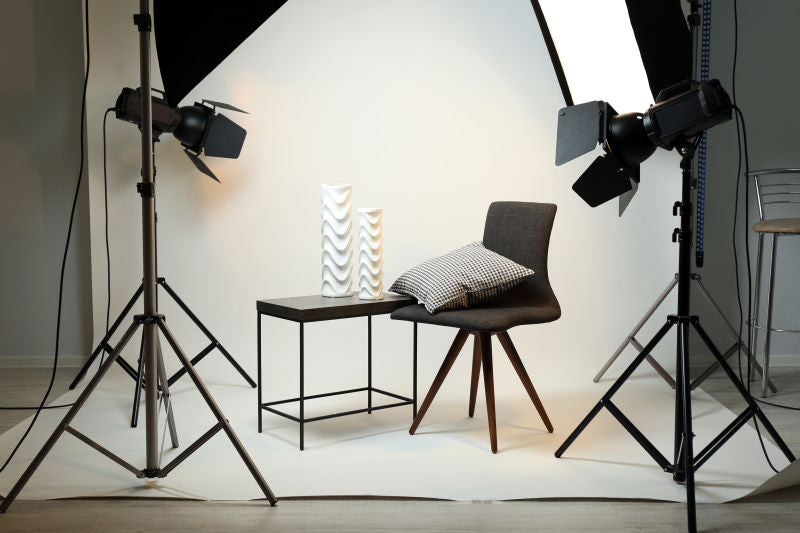
What Is a Softbox and How Does It Work?
Harsh shadows behind your subject, uneven light across a product, or portraits that look less natural than you expected: these are common frustrations when you start taking photos at home. Turning up a bare light can make the scene brighter without solving the problem.
So, what is a softbox? A softbox is a photography light modifier that spreads light across a larger surface and helps you control where it goes. This guide to softbox lighting for beginners explains how it works, how to position it, and how to choose a practical setup for portraits, products, and video.
What Is a Softbox and How Does It Work?
A softbox is an enclosure fitted around a compatible light source. Its frame and outer fabric hold its shape and help prevent light from escaping through the sides. Inside, reflective material redirects some of the output toward a translucent front diffusion panel. Some designs also include an inner diffuser.
The modifier itself is not the light: it shapes the output of a bulb, LED fixture, or flash. A complete kit may include the modifier, a compatible light, a holder, and a stand. Do not assume any bulb or fixture can be safely fitted inside any softbox.
When the light turns on, some output travels directly toward the front panel and some reflects from the lining. The diffusion fabric scatters transmitted light, making the illuminated front surface act as a larger apparent light source. How evenly the face is illuminated depends on the source and modifier design.
This larger apparent source helps soften shadows. A harsh shadow has a distinct edge; a soft shadow has a gradual transition from light to dark. Light arriving from different points across a broad surface helps create that gentler transition.
However, diffusion alone does not guarantee soft light. Size relative to the subject and distance matter. A large softbox far away can appear small to the subject, while bringing the same softbox closer generally softens shadow edges. Soft light is not the same as dim light, and it does not eliminate every shadow.
Why Use Softbox Lighting for Portraits, Products, and Video?
For portraits, a broad source can make transitions across the face look gentler. Try placing it slightly above eye level and off to one side, then adjust for your subject. Soft light does not remove skin texture, and the most flattering angle varies by person.
In product photography, a nearby softbox can soften the sharply defined shadow a bare light might cast behind an object. Softbox photography also gives you a controllable shape in reflections: a glossy product may show a broad highlight rather than a tiny bright point. Move the light, camera, or object until the reflection helps describe its shape instead of hiding its label.
For small subjects and a simple home setup, the EMART 16 × 16 inch Softbox Light is one compact option with adjustable LED brightness and color temperature.

If you are looking for the best softbox for product photography, start with your products rather than a universal ranking. Consider their size, surface finish, the reflections you want, and the space available. A compact softbox close to a small object may be more practical than a larger modifier you cannot position effectively.
Artificial lighting also makes a setup easier to repeat than relying entirely on changing window light. Keep placement and camera settings consistent, and account for daylight or room lights that still contribute. This is useful for product batches, tutorials, and recurring video recordings.
How Size, Distance, and Grids Change the Light
At a comparable distance, a larger illuminated surface generally creates softer shadow edges relative to the same subject. A larger modifier can also help cover a larger area, although coverage depends on positioning, design, and available output.
A 16 × 16-inch square softbox takes up less modifier space than a 20 × 28-inch rectangle. It can suit tabletop work or a straightforward home recording arrangement. The larger rectangle offers a taller lighting surface that can be useful for portraits and larger subjects. Shape also affects reflections and catchlights.
Bigger is not automatically better. A small softbox close to a small product may create gentler transitions than a larger one much farther away. Closer placement also tends to increase the brightness difference between near and far parts of a scene. Leave space for fully opened stand legs and clear walkways.
A honeycomb grid adds another type of control. Its fabric cells restrict light traveling at wider angles, helping limit sideways spill onto walls or a background. This can help light a portrait subject or presenter without brightening the whole room.
A grid is not an independent diffuser and does not create soft light by itself. It cannot guarantee a dark background if other light reaches it. The EMART 20 × 28 inch Softbox Lighting Kit with Grid, 2-Pack combines rectangular modifiers with grids for directional control.

Softbox vs. Umbrella Lighting: Which Should You Choose?
Both modifiers can create soft light when their illuminated surface appears large relative to the subject. An umbrella either transmits light through translucent fabric or reflects it back from its inner surface, depending on the design. A softbox channels light through an enclosed modifier and a front diffusion panel.
A shoot-through umbrella typically spreads light broadly. That can be useful when you want to illuminate a wider area, but it may also send more light onto nearby walls and backgrounds. A softbox, especially with a grid, is often useful when controlling spill is a priority. The exact result depends on modifier design and placement.
For a home portrait or product setup, choose based on where you need the light to go. An umbrella can be useful for broad illumination; a softbox can help when you want more deliberate control over the subject and background. Neither guarantees softer light simply because of its name. Compare apparent size, distance, and the reflections each creates.
Choosing a Single-Light or Dual-Light Softbox Lighting Setup
One main light is enough to begin. Try a portrait or tabletop scene and reposition the light before adding equipment. A white reflector can return some light into the shadow side without another powered source. This keeps a first softbox lighting setup easier to understand.
The EMART 16 × 16-inch single-light kit includes one softbox, one 85W LED bulb, a remote, and a stand adjustable from 18 to 65 inches. Brightness adjustment and a 3000K–6000K color-temperature range let you refine the light without rebuilding the setup. It also includes a removable front diffuser, silver reflective lining, reverse-folding stand, 3-meter power cord, and carry bag.
Two lights let you position a main light and fill light independently. Start with the fill less intense at the subject than the main light, then adjust shadow depth. Equal brightness on both sides is an option, not a requirement.
The EMART 20 × 28-inch dual softbox lighting kit with grids discussed here is the 2-Pack configuration. It includes two softboxes with grids, two 85W LED bulbs, two remotes, and two stands adjustable from 31.5 to 75.2 inches. The lights offer 0–100% stepless dimming and a 3000K–6500K color-temperature range. Push-button opening mechanisms, 3-meter power cables, and a carry bag support setup and storage. AAA batteries for the remotes are not included.
Choose the compact single-light option for a smaller modifier and a simple starting point. Consider the larger two-light kit if you have room and need separate main and fill control plus grids. Check stand height, leg clearance, and storage needs too. Neither choice replaces careful placement and practice.
How to Set Up Softbox Lighting for Beginners
Learning how to use a softbox is easier when you keep the first scene simple. Choose one subject and make small changes, rather than adjusting every setting at once.
- Position the light. Assemble the kit according to its instructions. Fully spread stand legs on a level surface and keep cables out of walkways. For a first portrait, try placing the light roughly 45 degrees to one side of the camera, slightly above eye level and angled toward the face. This is a starting point, not a fixed rule.
- Test distance and angle. Take a photo, move the light closer or farther away, and compare shadow edges, coverage, and exposure. Tilt or rotate it in small increments, checking under-eye shadows or product reflections and label readability. Both featured EMART models have 210° adjustable light heads. Maintain safe clearance and follow the equipment instructions.
- Set brightness and color. Adjust brightness while watching highlights on skin or shiny surfaces. Choose a color temperature and set the camera's white balance accordingly. Higher Kelvin does not automatically mean brighter light. The 16 × 16-inch model offers 3000K–6000K adjustment; the 20 × 28-inch model offers 3000K–6500K. Their remotes let you refine settings from your shooting position.
- Refine one thing at a time. Change distance, angle, brightness, or fill individually so you understand the result. With two lights, occasionally switch off the fill to see what it contributes. With grids, compare the scene with and without them. Save reference photos or notes to repeat a setup you like.
For softbox lighting for beginners, the most useful habit is to review the image after each change. Avoid mixing very different light colors unless it is intentional. For room planning beyond the lights themselves, see how to set up a home photo studio.
Frequently Asked Questions
Is a softbox better than a regular light?
It depends on the look you want. A softbox modifies a compatible light to create a larger, more controllable source. Bare light is useful when hard shadows are intentional.
Do beginners need a softbox?
No. You can learn with window light and a reflector. A softbox kit is useful for more control over timing, placement, and repeatability.
Can you use a softbox for video recording?
Yes, with a continuous light suitable for video. The featured kits use LED bulbs. Test your camera settings and lighting before recording a full session.
How far should a softbox be from the subject?
There is no single correct distance. Start outside the frame with safe clearance, then compare test shots for shadow softness, coverage, and exposure.
Can you use a softbox at home?
Yes, with enough room for the modifier, fully opened stand legs, safe cable routing, and the clearances required by the equipment instructions.
What size softbox should beginners buy?
Choose for your subject and room. A compact square can suit small products or a desk setup; a larger rectangle may suit broader coverage if you can position it effectively.
What is the purpose of a softbox grid?
It restricts sideways spill and helps direct illumination. It does not soften light independently or replace careful positioning.
Is one softbox enough for photography?
Yes, for many simple portraits and product setups. Add a second light when you need independent fill or illumination for another part of the scene.
Conclusion
A softbox spreads a compatible light's output across a larger diffusion surface, helping you shape shadows and control illumination. The result depends on apparent size, distance, angle, and the rest of your photography lighting setup, not simply the presence of diffusion fabric.
Start with one subject and a few test shots. Learn what moving the light changes, then decide whether a larger modifier, a grid, or a second light would solve a specific problem. Explore the EMART softbox lighting collection to compare options for your space and the content you want to create.